


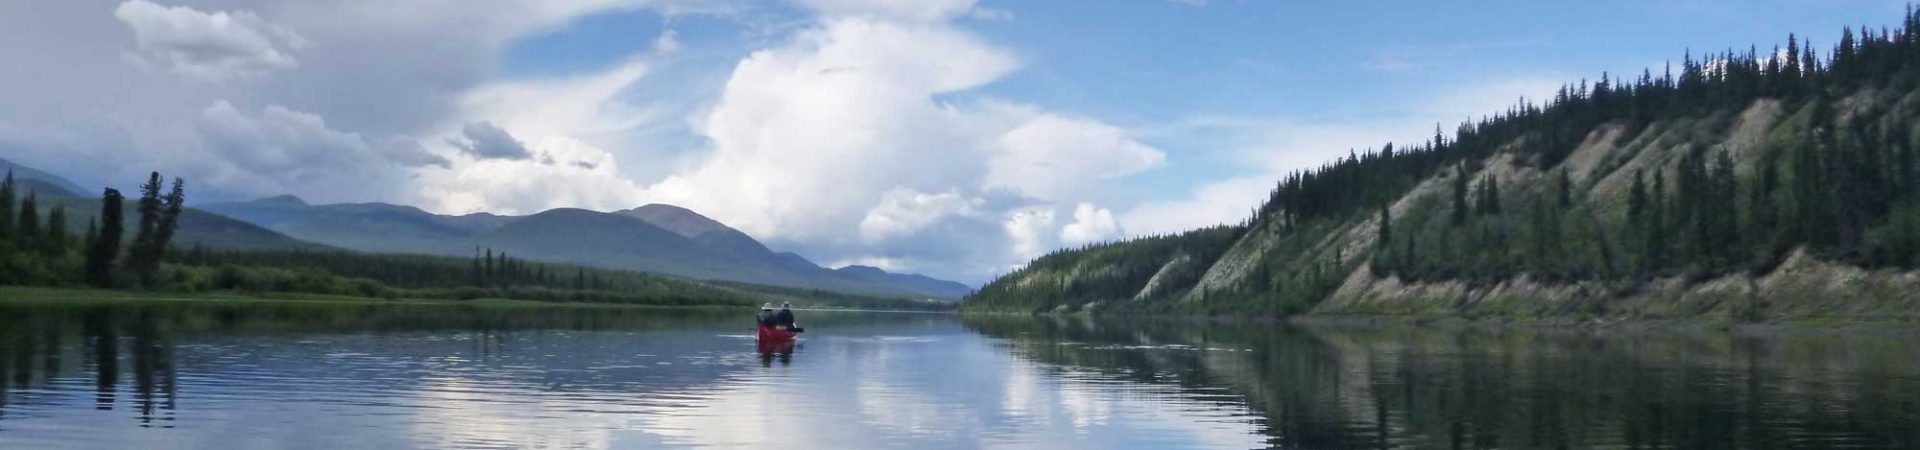

Day 1-Starting our ascent of the Great Western Divide
The High Sierra Trail (HST), a 72 mile trail in Sequoia National Park (NP), is a classic hike in the Sierra Nevada. It evokes the very ghost of John Muir with its soaring peaks, highly varied terrain, grand vistas and spectacular ending at the top of Mt. Whitney. Cutting through a cross-section of some of the most dramatic scenery in the Southern Sierra, the lengthy hike tests the resolve of all but the most seasoned and fit backpackers in an area of the park that is bereft of roads and resupply points.
My husband, Steve, and I hiked the High Sierra Trail in August 2012, finding it one of the best (and longest!) hikes we had ever done. With a little planning we managed to keep our pack weight down and surprised ourselves by finding the trail challenging but not overwhelming. Standing at the summit of Mt. Whitney I felt a strong sense of accomplishment as I looked back over the trail we had done—the start was a long way away. Part 1 of this post covers background, planning and logistics, while Parts 2 and 3 cover our itinerary and trip report (see below for links).

Relaxing at lunch, Day 1
Standing in the vast, fertile expanse of the San Joaquin Valley, California’s first surveyors looked at the saw tooth peaks of the Southern Sierra Nevada in wonder. They had seen similar pinnacles from the flat, dry expanse of the Owen’s Valley on the eastern side and could be forgiven for thinking that they were seeing the same crests. It wasn’t until the first adventurous explorers ventured into the jumbled mass of granite, searching for passable routes through a multitude of 13,000 foot summits, that they realized that the range was much wider than expected, and that a series of mountains formed the wide spine of the Southern Sierra Nevada. In fact the crags spread across more than 70 miles in an east-west direction, starting with the highest peak in the contiguous U.S., Mt. Whitney, standing tall at 14,500 feet (roughly—trying to nail down the height of Mt. Whitney was as challenging as determining the exact length of the trail. Wikipedia cites 14,505 feet, while the marker at the top states 14,496 feet). This forms the route of the High Sierra Trail, an audacious cut through some of the most rugged terrain found in the Sierra. At 72 miles the trail is a little too short to be considered a long distance hike in the company of the Pacific Crest Trail (PCT-2,663 miles), the Appalachian Trail (AT-2,184 miles) or even the John Muir Trail (JMT-210 miles). But because of its elevation changes, with lots of ups and downs, the HST is rigorous in its own right.
When we visited Sequoia NP earlier in the summer we hiked to the top Alta Peak and gazed eastward at the confused sea of summits, wondering how a trail could possibly wend its way through them. Before we even finished Alta Peak we were plotting our return to these majestic mountains. With an eye on doing the JMT someday I thought it would be a good test to do the HST next year but Steve jump-started it by suggested that we do it this year. Once I swung into action getting permits and making plans he started backpedaling but by then we were committed.
Ultralight gear

Inga with her new, lighter pack
Since our bodies have been telling us that we’re getting older we’ve been considering that one way to assure that we stay in backpacking shape is to reduce the weight we have to carry, which threw us into a frenzy of research into ultralight backpacking and trips to REI to check out gear. Ultralight has many definitions but one is a base pack of less than ten pounds, sans food and water. We were usually carrying 35-45 pounds depending on the length of the trip. On our Chilkoot Trail trip of my notes say that my pack was 38 pounds while Steve’s was 39 pounds, with most of our food but no water, when they were weighed before the flight to Skagway. With a few added fresh food items, fuel and water we were probably pushing 45 pounds each. Considering it an investment in our backpacking future we purchased new ultralight packs, the REI Flash, which for me, at two pounds, twelve ounces, knocked off three pounds in one fell swoop. We ditched our luxurious Thermarest traditional pads in favor of their new light NeoAir Trekker (twenty six ounces) and shaved off more weight. The rest was pretty much a matter of severely restricting other things like extra clothing and luxury items, and trimming food down to the bare minimum, knowing that we often return with extra gorp and other snacks. I was pretty pleased with my base pack weight of about 22 pounds (perhaps 30 to 35 with food and water) for this nine day trip but I still have a long way to go before I can consider myself an ultralight backpacker. This is a topic that much is written about, and I’ve learned a great deal from following the debates on the JMT Yahoo Group and PCT Listserve for two years.
Permit

Steve on the trail, Day 1
A permit is required for the HST and can be obtained from Sequoia National Park. During the summer quota season the permit is $15 per group and hikers are limited to 30 per day. Three quarters of the permits are offered in advance, with one quarter reserved for walk-ins. During other seasons permits are free and there are no quotas, but are still required. Permits can be reserved ahead of time but must be picked up in person at the permit station closest to the starting trailhead, and only in the morning before 9 a.m.. Many people do the HST west to east starting at Crescent Meadow near the main Lodgepole Visitor Center in Sequoia NP, but others start at the more isolated Mineral King area, also on the west side. Some do it in the opposite direction starting on the east side at Mt. Whitney or other trailheads accessed from Highway 395. One major benefit of the HST permit issued for the western starting points of Crescent Meadow or Mineral King is that only one permit is needed and no separate permit (distributed via a lottery system) for Mt. Whitney is required. The application must be sent in by mail or fax.
Transportation

Inga was submerged every chance she got, Day 2
Transportation is a challenge for there are no roads that bisect the park. We drove our car from San Francisco to Lodgepole in Sequoia NP and left our car at the trailhead at Crescent Meadow. I somehow talked a willing friend into picking us up in Lone Pine. She lives in Newport Beach so it was no small trip for her to come and get us. We spent one night at the comfortable Best Western Frontier Motel in Lone Pine and drove back to Lodgepole the next day in about six hours.
We spoke to many people on the trail doing other sections who asked us how we did it—it appears to be a major obstacle for many. One duo had left their car on the western side, then rented a car to leave at the eastern side. Another group was considering a future trip by splitting a troupe into two parts, each starting at the opposite end so cars would be available at the terminus for each group. Another option is to take the Whitney Shuttle Service from Lone Pine to the starting point at Sequoia NP or to Ridgecrest where there are car rental agencies. Some hardy souls resupply in Lone Pine and walk back. Having a trail angel with a car was the best option for us.
Information about the trail

Tunnel through an avalanche-prone section, Day 2
The best information, and the one that most of the blog entries I read referred to, is a two page printable document on the official Sequoia NP website under “Plan Your Visit” titled “High Sierra Trail”. This compact document really does have all the information you need, especially because the trail is extremely well marked, with trail markers at every junction. Campsites and water are readily available, even in late summer, so with a topographic map and compass, just in case, it is an easy trail to navigate. At the bottom of the document is a detailed chart with distances between the campsites. They break the hike into seven days, which is the minimum amount of time necessary to do the hike comfortably, and would be a fairly reasonable way to do it. We, on the other hand, wanted to take a leisurely approach and vowed to leave an extra half or whole day as a “zero” day with zero miles hiked. We allowed for nine days (eight nights) of hiking but got ahead of ourselves and ended up completing it in eight days at a comfortable pace.
Other than that I found a surprising lack of information about the trail. Now there is a High Sierra Facebook Group for the trail. There is a good e-guide that can be downloaded for free onto smartphones from EveryTrail. Toward the end of my planning, when I could actually think about the finish, I found some good information on the Whitney Portal Store Forum, found under Messages on their website.
The most challenging days for both of us were the second and seventh days. The second day involved a great deal of elevation gain to get up and over the Great Western Divide, while the seventh day was the Whitney ascent day, which we very much expected to be a long, arduous day. The challenges of these two days were a bit different as part of the issue on the second day is that it was early in the trip so we were less acclimated to the elevation and the effort of hiking, and our packs were near their heaviest. By the time we got to Whitney we were better acclimated, somewhat trail hardened and our packs were lighter. However, I still felt the altitude greatly and the thin air above 12,000 feet made for a lot of huffing and puffing.
Effects of altitude

Steve at Kaweah Gap, ~10,000 feet, Day 3
Above 10,000 feet I generally had low grade nausea, mild headaches and slept restlessly, all symptoms of mild altitude sickness, though Steve never experienced any symptoms. Ibuprophen took care of the headache but I still felt a bit “off”. When we descended to 6,000 feet at Kern Hot Springs I felt wonderful, took a 2 hour nap and slept solidly for 8 hours at night. Back up at 10,000 feet at Guitar Lake I felt the symptoms again, and on the summit Steve noticed that my eyes were puffy, my fingers were blueish and I had a little cough. I was glad we had decided against sleeping at 14,500 feet, and felt good at 12,000 feet at Trail Camp. “Hike high, sleep low” is a good adage. After communicating with a wilderness physician later I would probably take Diamox next time, which he recommended.
We stayed at few places we had planned for the first half of the trip and were pleased at how easy it was to find good campsites all along the trail.
See related articles:
HIGH SIERRA TRAIL, PART 2: START TO DAY FOUR
HIGH SIERRA TRAIL, PART 3: DAY FIVE TO END
REACHING NEW HIGHS ON ALTA PEAK
THE WONDERS OF SEQUOIA NATIONAL PARK
Information:
Sequoia National Park
86724 Highway 180
Sequoia National Park, CA 93262
559-565-3341
SEKI is the combined Sequoia and Kings Canyon National Parks
Lodgepole Visitor Center
63204 Lodgepole Road
Sequoia National Park, CA 93262
Open early spring through late fall, may be open weekends in winter.
Guidebook
Hiking Sequoia and Kings Canyon National Parks, by Laurel Scheidt, contains information and detailed maps about the first part of the hike only.
E-Guide–EveryTrail, an excellent detailed guide to the HST in seven segments.
Map
Tom Harrison’s Sequoia and Kings Canyon National Parks Recreation Map
Where to Stay:
Hotel:
For lodging prior to the hike the comfortable Wuksachi Lodge is the only option in the park other than camping. This full service lodge has large, well-appointed rooms with free Wi-Fi, mini-refrigerator and flat screen TV. The Peaks restaurant serves a breakfast buffet, lunch and dinner featuring a locally-inspired menu, and the bartender mixes a mean cocktail. A small lobby has comfortable sofas and chairs around a large wood-burning fireplace.
Wuksachi Lodge
64740 Wuksachi Way
Sequoia National Park, CA 93262
866-807-3598
There is a large campground at Lodgepole that fills up quickly. The Dorst Creek campground is a good alternative prior to the hike.
Whitney Portal:
There is a hiker’s campground operated by the Forest Service a few steps from the end of the trail and the Whitney Portal Store. There are also several motels and hostels in the nearby town on Lone Pine on Highway 395.
Frontier Motel
1008 South Main Street
Lone Pine, CA 93545
760-876-5571
Whitney Portal Hostel
238 South Main Stree
Lone Pine, CA 93545
760-876-0030
Getting There:
To reach the western entrance of Sequoia National Park from San Francisco by car (approximately 5 hours, depending on traffic and weather):
All photos by Inga Aksamit and Steve Mullen.

Sunset from Precipice Lake, Day 2
Leah Thompson says:
Wonderful shots! I’ve been on that place. Sequoia national park accommodation was one of the best I experienced.
Mani says:
Thanks so much for sharing your story ! We are now inspired to do this ourselves !
Did you 2 do this by yourselves or through a hiking group ?
Inga says:
That’s so great that you want to do the High Sierra Trail! It’s a beautiful piece of wilderness. We did it by ourselves, just the two of us. We did have quite a bit of backpacking experience, mostly around Tahoe at the time, and mostly 2-4 day trips. This one stretched us a bit in terms of length but inspired us to the John Muir Trail two years later.
Sherry Turner says:
Hi Inga, I wanted to thank you for your book on JMT. It was great and I’m planning on using it more when I do the whole thing next summer. I am planning on doing High sierra trail and reading your blog. The entry trail on permit, do I write high sierra or crescent meadow? Thanks Sherry
Inga says:
Hi Sherry,
I’m so glad you liked the book. Put Crescent Meadow for the entry and Whitney Portal for the exit. You could write “Crescent Meadow-HST” to provide extra information. Have fun!